Meters
Das-Meter has thirteen kinds of Meter. Right-click one for its settings; the settings panel has the same settings for every Meter, and a few more. Step-by-step guides: Tonal Balance and A/B and Kick and bass in the Phase Scope.
Waveform
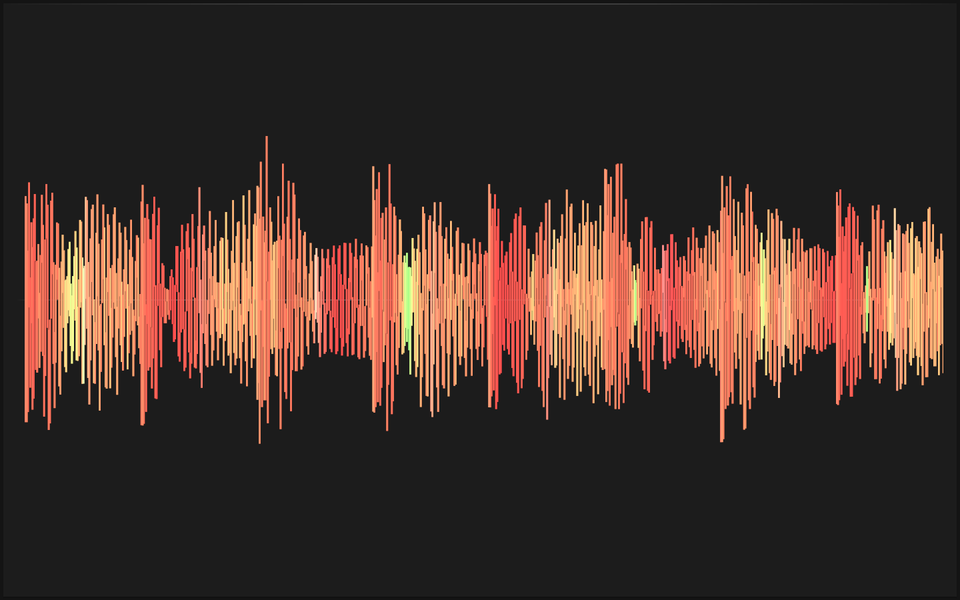
The audio over time, coloured by frequency band (low, mid, high). Settings: Channels (mono, Left/Right, or Mid/Side), time span (1–30 s), display gain and the two band crossovers. Boost quiet input brings a quiet signal up to a good height (by up to +30 dB on top of the gain): it rises slowly and comes down at once, so a loud hit is never cut off.
The Waveform stays put in time and a camera glides over it: each slice of the audio is drawn once, where it belongs, and only the view moves. So it scrolls smoothly, by fractions of a pixel, without any part of it shimmering.
Spectrum
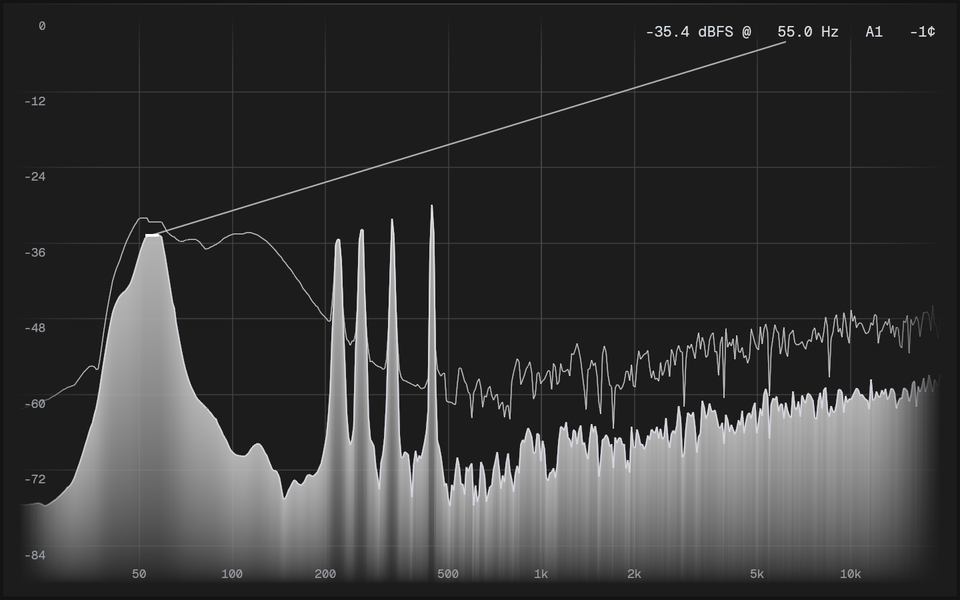
How loud each frequency is. Settings: Channels, FFT size, window, Slope (0, 3, 4.5 or 6 dB per octave, pivoted at 1 kHz), Smoothing, Style (a line, or bars at 3, 6 or 12 per octave), attack and release, Peak hold, Peak line, and the shown frequency and level ranges. With Peak line on, the loudest peak's level, frequency and note stay at the top right, and a thin line runs from the peak to them. The peak is the music's loudest as it is, usually the kick or the bass, not as the slope tilts it: changing the slope moves the curve, never which peak the line follows. Mouse readout (on by default) reads any frequency and its note under the mouse. Drag a box over the Spectrum to zoom into it: a zoom window opens in the other half of the Meter, showing the box's frequencies and levels larger, with its own scale and a finer frequency resolution (the largest FFT size). Its × closes it. A tone keeps its level in the zoom window, but noise looks lower there, since each point covers fewer frequencies. While the mouse is over the Spectrum it falls slower and holds its peaks (Slow down under the mouse), and the peaks that keep sounding get a dot with their note; the one nearest the mouse also shows its frequency and level. Only peaks that stand out for a couple of seconds are marked, and a dot stays where it was found. The zoom window marks its peaks the same way. Colour ▸ Steady harmonics makes harmonics that keep sounding glow brighter. Their colours, Spectrum peak dots and Spectrum harmonics, are with the Spectrum's other colours in the Theme and the Meter's own colours. With two traces (Left and Right, or Mid and Side), the second one's colour is Spectrum R / Side.
Overlay Source and collisions
Listening to Send Plugins, a Spectrum can show a second track on the same graph: pick it under Overlay Source in the Meter's menu (any other Send Plugin from the same DAW). It's drawn as a line in that track's colour, named at the top right.
Where the two collide, both loud at the same frequencies and close in level, a strip along the bottom of the Spectrum is marked in the Spectrum collisions colour, more solid where both are louder: kick and bass on the same low notes, vocal and synth in the same mids. A frequency collides where both are over Collisions above (−50 dB by default, on the Spectrum's own scale, slope included) and within 6 dB of each other. It's a plain comparison of levels, not a model of how the ear masks one sound with another.
Long-term average and Reference curves
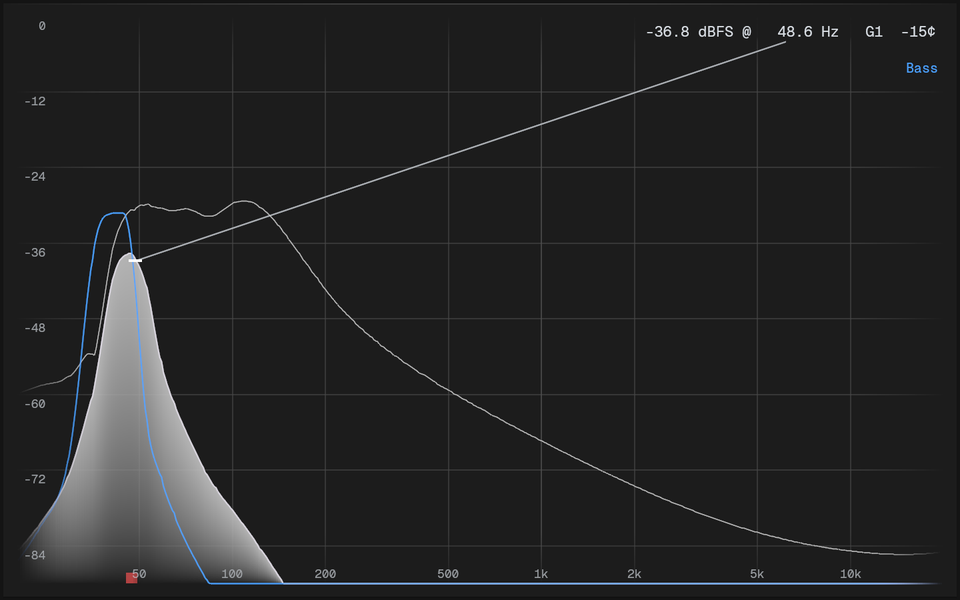
Long-term average draws a second, calmer line beside the live trace: the average over the last 3 s, 10 s or 30 s, or over everything since you last reset it (Whole). Silence is left out, so a pause doesn't pull it down. Reset long-term average in the Meter's menu starts it over.
Reference curves are in the Spectrum's settings (Settings… in its menu): with the long-term average on, play a reference track, type a name and press Save curve to keep that average as a curve. Pick one under Show and it's drawn dashed behind the live trace, with the Spectrum's slope, so you can compare your mix with it. Each Spectrum remembers its curve in the Preset, and an exported Preset takes its curves along. Curves are files in the curves folder:
- macOS:
~/Library/Application Support/Das-Meter/curves - Windows:
%APPDATA%\Das-Meter\curves - Linux:
~/.config/das-meter/curves
A curve is stored without the slope, 24 points per octave from 20 Hz to 20 kHz, so changing the slope or FFT size later doesn't spoil it.
Loudness Meter
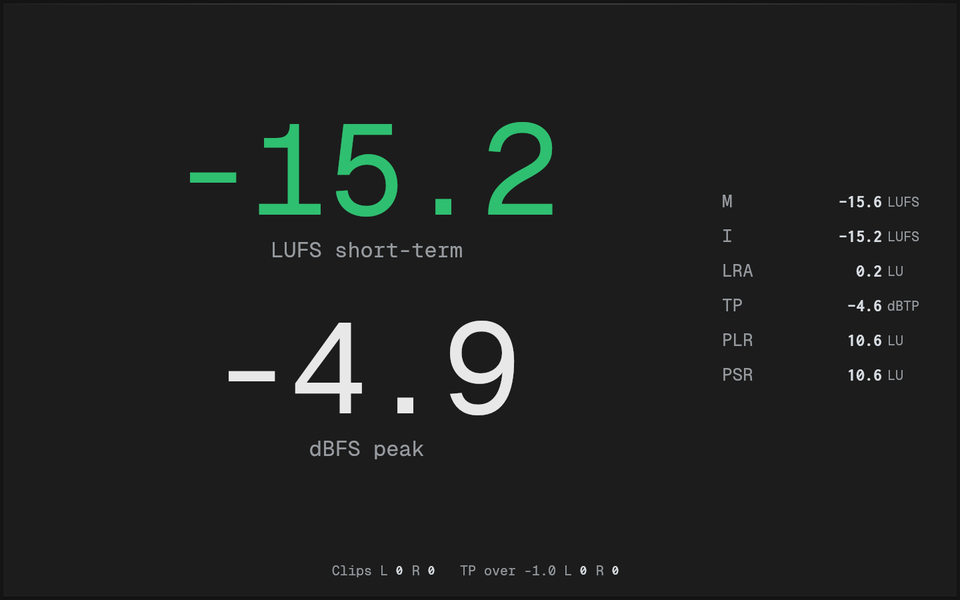
How loud the audio is: momentary (M), short-term (S) and integrated (I) LUFS, loudness range (LRA), true peak (TP), and the peak-to-loudness ratios PLR (true-peak maximum − integrated) and PSR (the last 3 s' true peak − short-term). By default it shows numbers only: two big numbers, the loudness (short-term LUFS unless Big reading picks momentary, integrated or true peak) and the sample peak in dBFS, with the other readings as plain rows. Thin bars adds a thin bar beside each big number. Turn on Show bars for the peak and RMS bars beside (or under) the numbers. Where there's room, the loudness graph shows the LUFS reading over the last 10 to 120 s, with the target and integrated lines. Settings: a Target loudness, Show true peak, Show LRA, Show PLR and PSR, Loudness graph and its span, the RMS window, peak hold (or Hold peaks until reset) and the bar range. Click the Meter to reset its integrated loudness, LRA, maxima and counters.
With the bars on, Scale picks how they read: Peak (sample peak and RMS in dBFS, with the LUFS bar), VU (0 VU at −18 dBFS by default, adjustable), a PPM (DIN, Nordic, BBC with its marks 1 to 7, or EBU) or the K-System (K-12, K-14, K-20: RMS with 0 at −12, −14 or −20 dB, turning colour above 0 and above +4). Each has its standard timing and numbers; see Measurements.
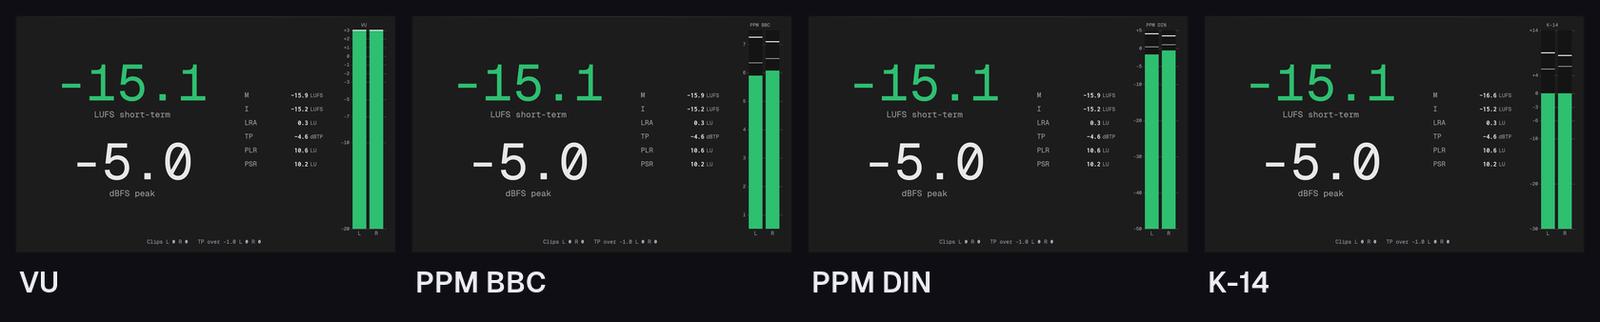
Along the bottom, the counters show per channel how many times the audio clipped (Clips: samples at or over 0 dBFS) and how many times its true peak went over a ceiling (TP over, −1 dBTP by default: what streaming services ask for). A run counts once, however long it lasts; a count turns red once it's above 0. Count clips and overs turns them off, and True-peak ceiling sets the ceiling (−6 to 0 dBTP).
See Measurements for exactly what each number is.
Stereometer
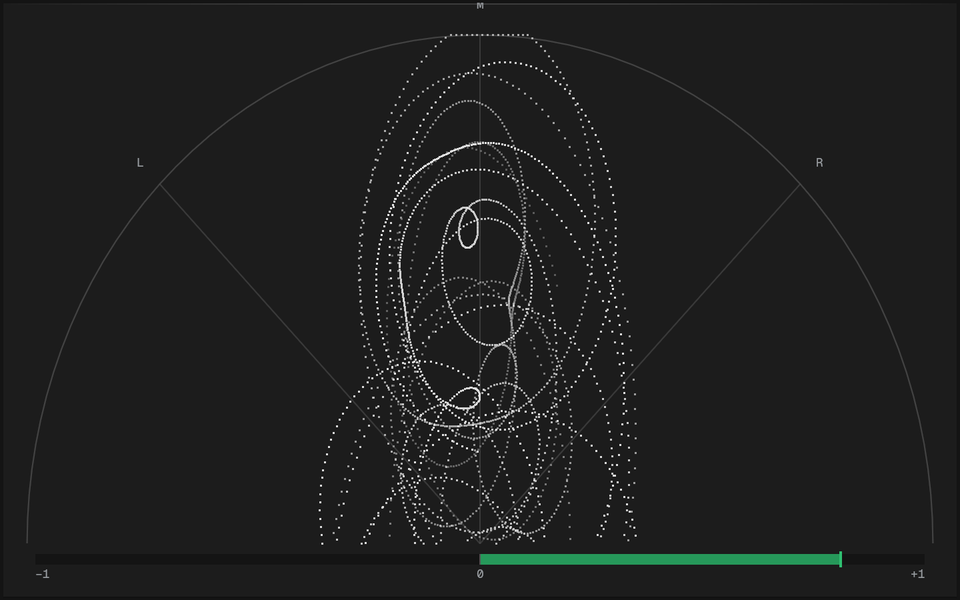
Where the sound sits between left and right, with the phase correlation under it (+1: mono, 0: unrelated, −1: out of phase) and an optional Balance bar. Settings: the view, Scale (auto or fixed gain), persistence and the correlation's averaging time. The scope stretches to whatever shape the Meter has; in a wide, low Meter the bars stand upright beside it.
Goniometer
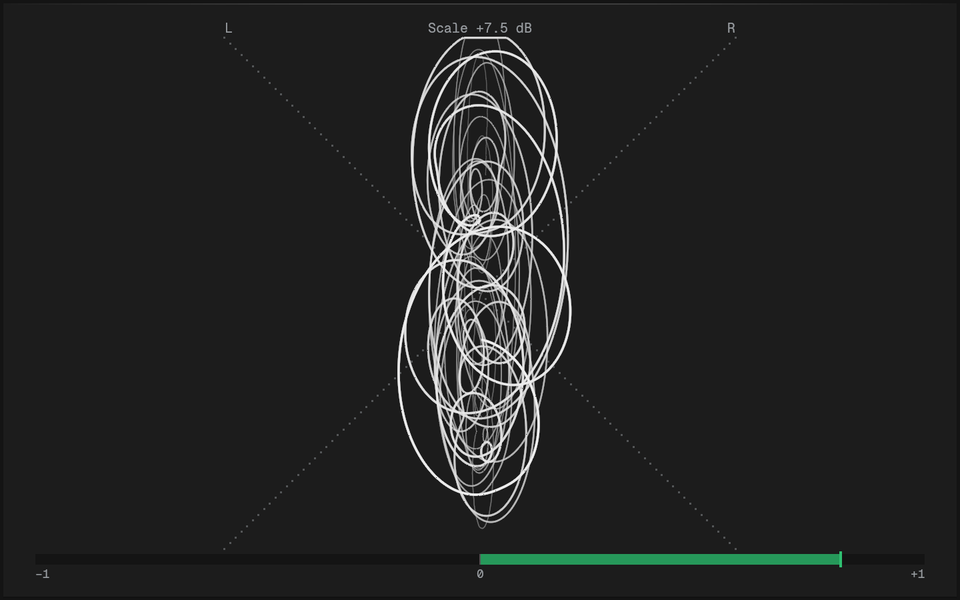
The stereo image as on the old studio meters: Left against Right as a cloud of glowing points, in a square with the L and R axes dotted across it. Mono stands upright in the middle, wide stereo spreads out sideways, and something out of phase lies flat. Where many points land the cloud burns towards white, so the densest part of the image glows hottest. A quiet signal is scaled up to fill the square, and Scale at the top says by how much (Scale in the settings: auto or a fixed gain). Below it, the phase correlation (+1 mono, −1 out of phase). Settings: Persistence (how long a point glows), Correlation bar and the correlation's averaging time. It uses the Stereometer's colours.
Cepstrum
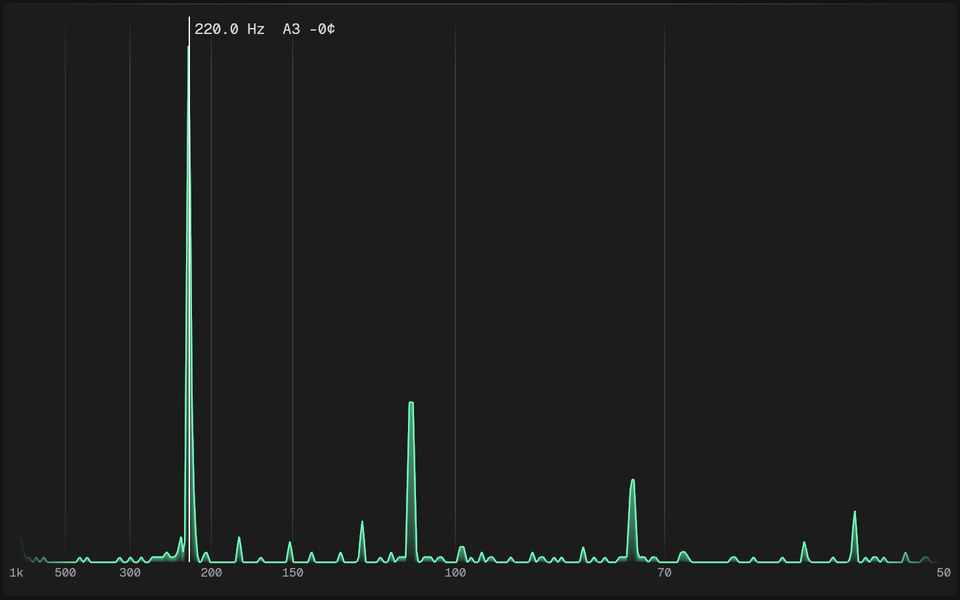
The cepstrum of the mono sum: evenly spaced partials of a harmonic sound (a voice, a bass, most instruments) make a peak at the length of their period, and echoes make peaks at their delay. The axis runs from short periods (high pitch) on the left to long ones (low pitch) on the right, labelled in Hz. With Show pitch on, a line marks the pitch found, with its frequency and note; noise and chords give "No pitch". Under the mouse it shows the pitch and note of the period there. Settings: FFT size, the lowest and highest pitch to look for (50 to 1000 Hz by default) and the smoothing.
To show it, right-click a Meter and choose Change Meter ▸ Cepstrum, or Add Meter ▸ Cepstrum.
Spectrogram
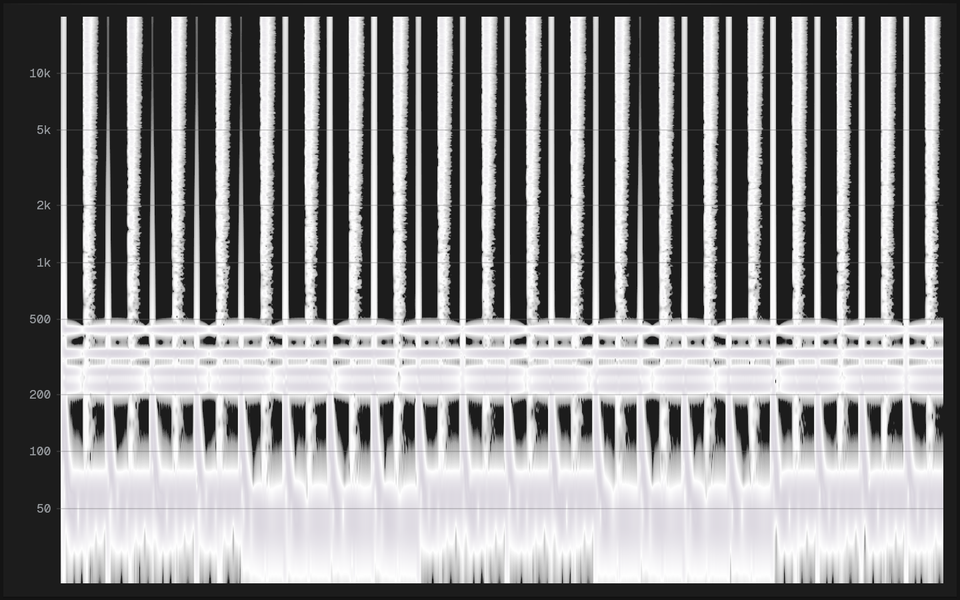
The Spectrum over time: frequency from the bottom up, time scrolling to the left with the newest audio at the right edge, and louder shown brighter, in the Theme's Spectrum colours up to its text colour. Settings: Span (5, 10, 20 or 30 s), Frequency scale, and in the settings panel the FFT size, window, slope and the frequency and level ranges. Drag a box over it to zoom into the box's frequencies: a zoom window opens in the other half of the Meter at the finest frequency resolution, scrolling three times slower so the detail shows. Its × closes it.
To show it, right-click a Meter and choose Change Meter ▸ Spectrogram, or Add Meter ▸ Spectrogram.
Phase Scope
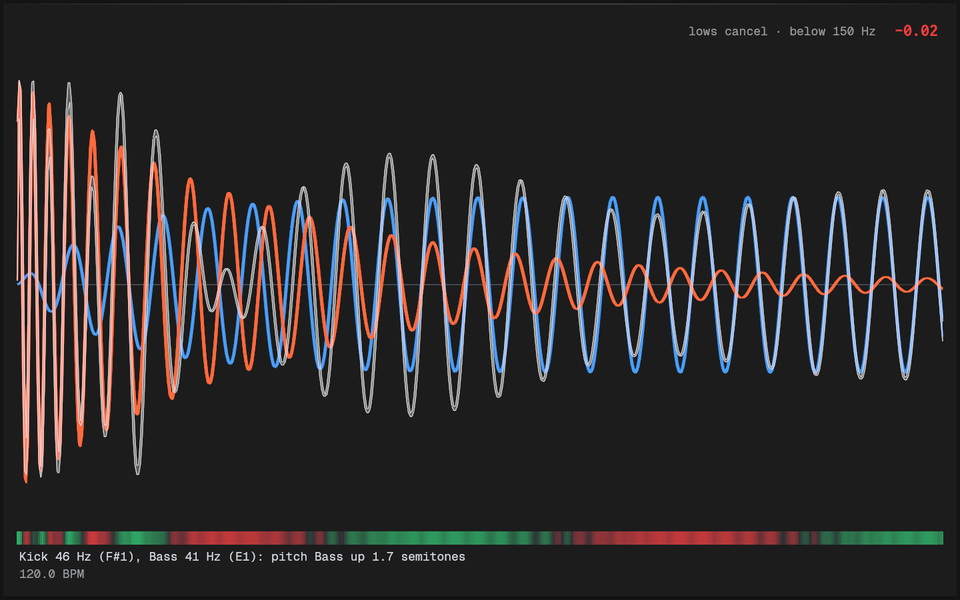
The waveform over one Cycle, one beat or one bar, held still so every beat lands in the same place: a kick on the beat stays put, and you can watch how its attack and tail sit against the bass. The newest Cycle is drawn sharp with the few before it fading behind. It's drawn as it plays, column by column, so a fade-out fades smoothly.
On a Send Plugin it follows the DAW: its tempo, its beat and, for a bar Cycle, its time signature. When the DAW stops, it keeps running at the last tempo and locks on again when you press play. On System Capture there's no DAW to follow, so it runs at a Tempo you type in (120 BPM by default), as it does for a Send Plugin from an older version or a host that doesn't say its tempo ("No tempo from …"). The tempo it follows is shown at the bottom left. All its options are in its right-click menu:
- Cycle: one beat, or one bar with a line on each beat. A bar follows the DAW's time signature, or is 4/4 when there's no DAW to say.
- Tempo, with a Tap button: tap along twice or more and the taps set it. A pause of two seconds starts a fresh count.
- Look: a line, or filled to the centre.
- Channels: mono, Left and Right, or Mid and Side, each in its own band.
- Gain: auto (the loudest point fills the Meter) or manual, in dB.
- Steadiness: the newest Cycle sharp with the previous few fading behind it, or the last few Cycles averaged, which holds a repeating pattern steady and smooths out a one-off.
Overlay Source
While listening to Send Plugins, pick an Overlay Source in the Phase Scope's menu: a second Send Plugin from the same DAW, say the bass track under a Phase Scope on the kick. It's drawn over the main trace in its own Send Plugin's colour, placed by its own song position, so the two line up as they do in the song, with their sum (what's actually left) drawn as its own waveform on top (Show sum, on by default), or in its own row under the two with Sum in its own row. A coloured lane under the Cycle shows how their lows move at each point: green where they push together, red where they cancel, stronger where they're louder. The number in the row above the waves is their Cycle correlation below the Cycle correlation below frequency (150 Hz by default), with what it means in words: +1 when the lows move together, −1 when one is the other upside down. It's measured over the last whole Cycle, about each track's own average, so it isn't the Stereometer's correlation (see Measurements). It's blank in silence, and the first thing left out when the Meter is small. Offset nudges it a few milliseconds later (+) or earlier (−). Turn on Suggestions and, when the lows don't fit, it says what would help under the lane: flip the Overlay Source's polarity, move it by so many milliseconds (set that as the Offset to hear it), or pitch it to match the other's low end. Once they fit it says so in green (Lows fit, with the number), and if nothing simple would help it says that too, so a change always gets an answer. If its Send Plugin goes away, the Phase Scope says "Waiting for …" until it's back. The pick and offset are saved in Presets. With System Capture there's only the one Source, so the option is greyed out. An Overlay Source is compared in mono, so while one is shown the main trace is mono too.
Text never sits on the traces. When it's small the suggestions go first, then the words beside the number, then the number, so the traces keep the room.
To show it, right-click a Meter and choose Change Meter ▸ Phase Scope, or Add Meter ▸ Phase Scope.
Oscilloscope
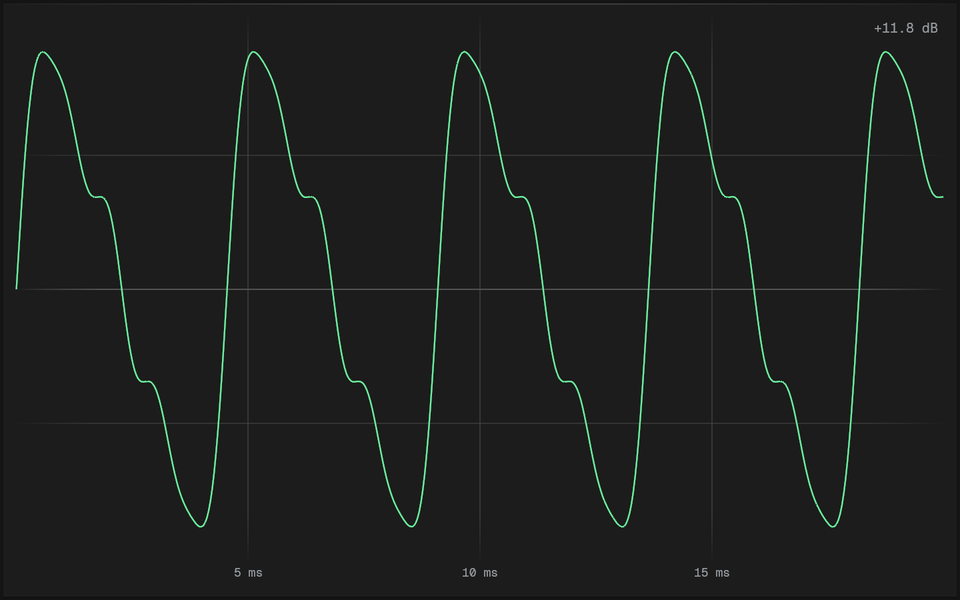
The wave itself, across a short window of time (20 ms by default, anything from 1 to 200 ms). With Hold still on, each picture starts on a rising zero crossing, so a steady tone stands still instead of rolling past; when nothing repeats (noise, silence) it runs free and the corner says "Free". With it off, it always shows the newest audio.
Channels shows the mono sum, or Left and Right (or Mid and Side) drawn over each other, the second in its own colour. Auto gain raises quiet audio to fill the height, by up to +48 dB, and shows how much in the corner: it drops at once when the audio gets louder and rises over about half a second when it gets quieter, and holds still in silence.
Lines across mark the centre and half height; the time divisions are labelled in milliseconds.
To show it, right-click a Meter and choose Change Meter ▸ Oscilloscope, or Add Meter ▸ Oscilloscope.
Needle Meter
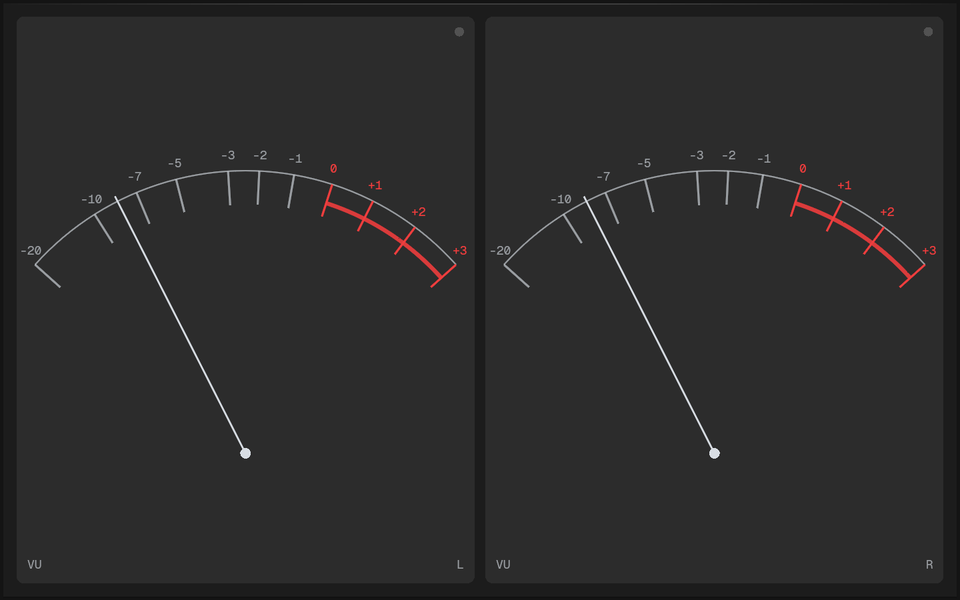
A classic needle per channel, Left and Right side by side (or one over the other, whichever gives bigger dials), or one needle on the mono sum. Scale picks VU (0 VU at −18 dBFS by default, adjustable) or a PPM (DIN, Nordic, BBC, EBU), each with the timing and numbers of the Loudness Meter's Scales (see Measurements). A VU's dial is spaced as real ones are, by voltage, so 0 VU sits about two thirds across; a PPM's is spaced by dB. The red zone starts at 0 VU, or at a PPM's permitted maximum (−9 dBFS). The lamp in the corner lights when a needle reaches the end of its scale and stays lit for a second. It fits the Bar.
To show it, right-click a Meter and choose Change Meter ▸ Needle Meter, or Add Meter ▸ Needle Meter.
Stereo Bands
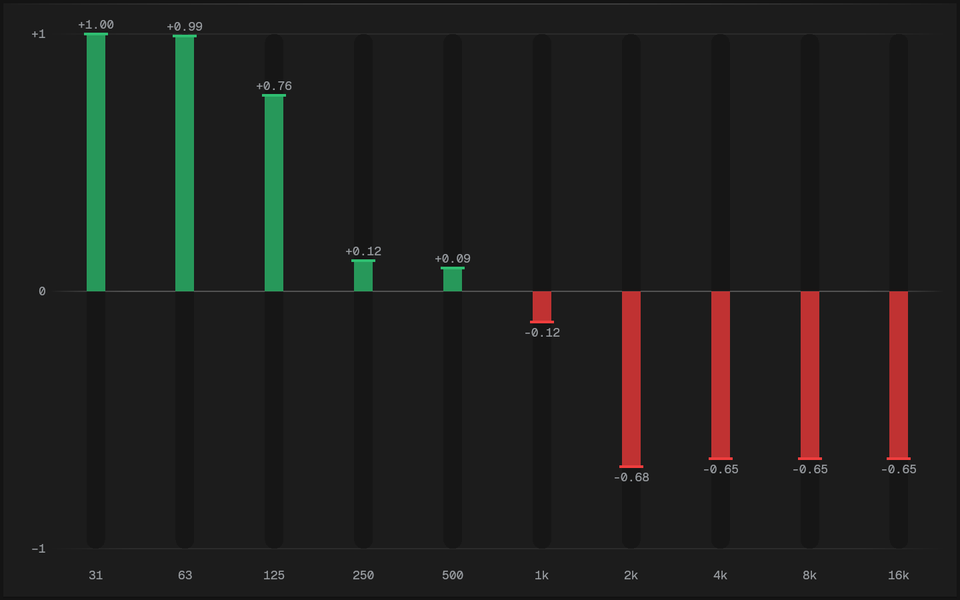
How alike Left and Right are in each of ten octave bands, from 31 Hz to 16 kHz: is the low end mono, and where is the width? Each band's band correlation is drawn as the Stereometer draws its Correlation: a bar from −1 (opposite polarity) to +1 (alike), filled from 0 with a marker at the reading, in the Correlation colours. It's the Stereometer's Correlation measured on that band alone, named apart so the two aren't confused. A silent band is left empty. Averaging sets how calmly the readings move (300 ms by default).
A common aim for electronic music: band correlation near +1 below about 120 Hz, so the low end stays punchy and survives mono playback. Tonal Balance's Low mono reading is the same maths below its cutoff.
To show it, right-click a Meter and choose Change Meter ▸ Stereo Bands, or Add Meter ▸ Stereo Bands.
Tuner
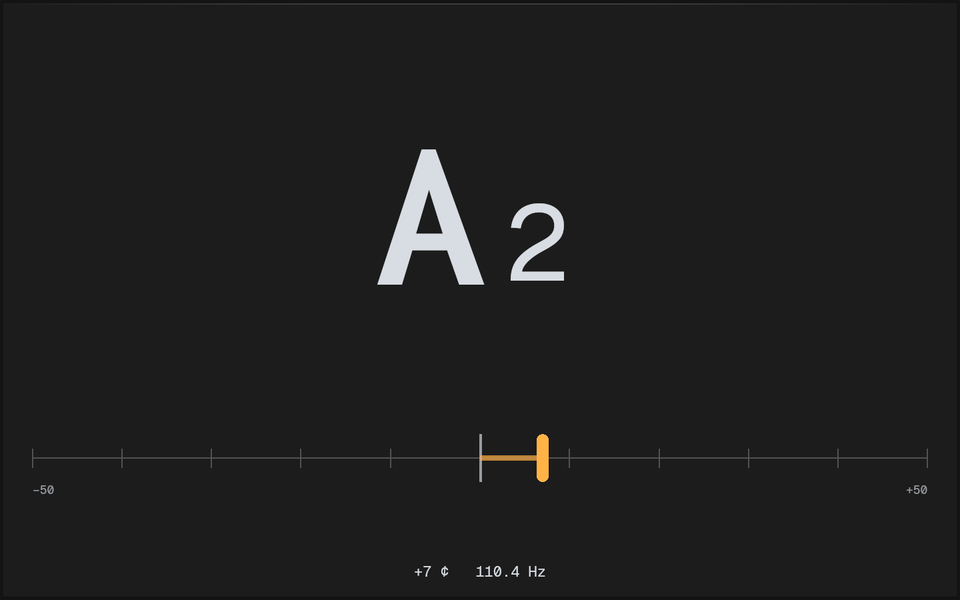
The note being played, large, with a bar of cents from −50 to +50 under it and the pitch in Hz: tune a bass, a kick's pitch or a synth. Within 5 cents of the note it turns the Tuner in tune colour. It finds the pitch as the Cepstrum does, then refines it from the sound's harmonics to about a cent, and steadies it while a note holds; a new note shows at once. When the pitch is lost it keeps the last reading for a second, faded.
A4 sets the reference pitch (415 to 466 Hz, 440 by default). Its advanced settings are the Cepstrum's: the FFT size (8192 by default, for low notes) and the lowest and highest pitch looked for (30 Hz to 1 kHz). Short and wide, as in the Bar, the note sits beside the bar.
To show it, right-click a Meter and choose Change Meter ▸ Tuner, or Add Meter ▸ Tuner.
Tonal Balance
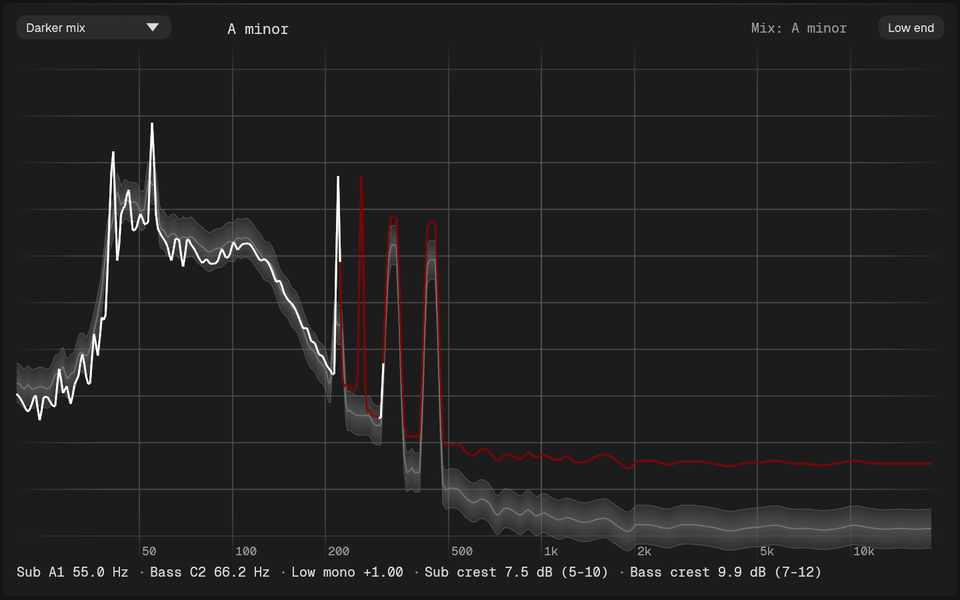
Compares the shape of your mix's spectrum with a Target: a reference made from songs you choose. Both are measured over a long stretch and set to their own loudness, so only the balance counts, not how loud each is. The mix's line is drawn over the Target's range: in its own colour where it's inside, too much or too little colours where it's outside, judged over about a third of an octave, as the ear hears balance.
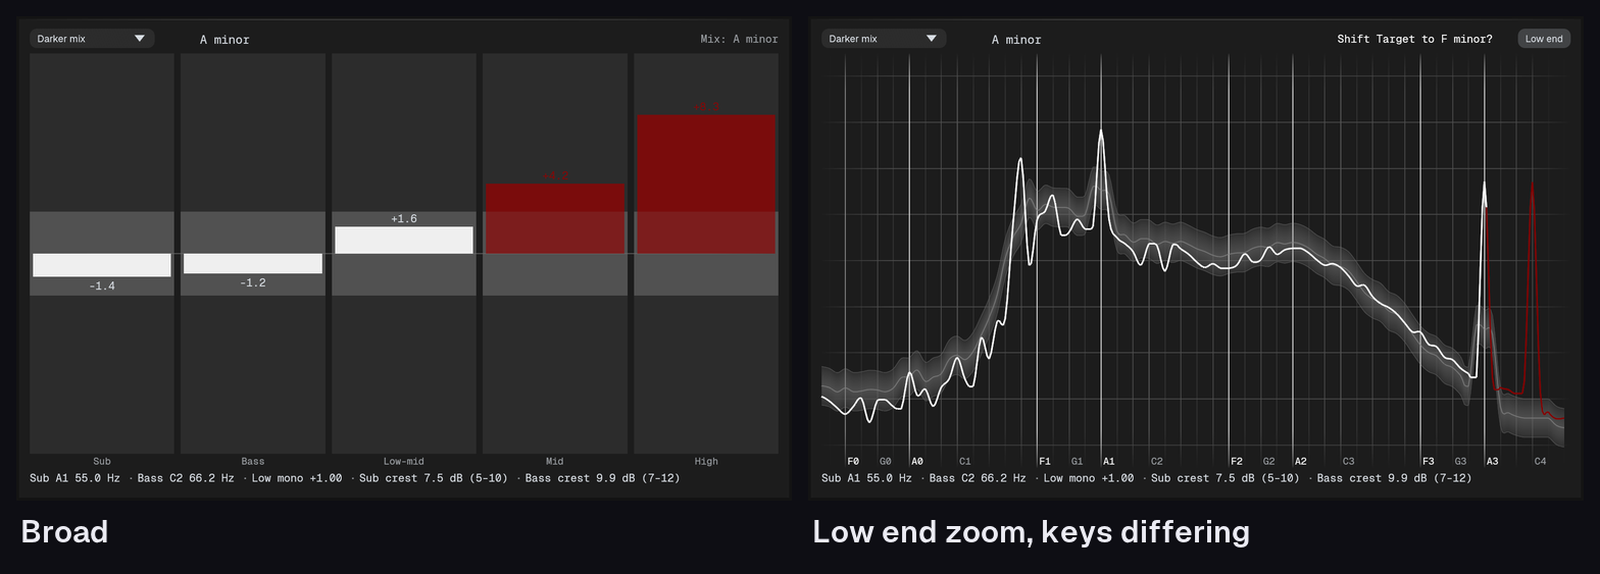
- Fine draws the curves from 20 Hz to 20 kHz, finest in the low end: 1/24 octave (two points per semitone) up to 300 Hz, coarser above.
- Broad draws five regions, Sub (20–60 Hz), Bass (60–120), Low-mid (120–300), Mid (300 Hz–2 kHz) and High, each a bar showing how far the mix is from the Target, inside its range or not.
- Auto (the default) shows Fine in a window and Broad in the Bar.
- Low end zoom (the Low end button on the Meter) shows only 20–300 Hz, with a grid line on every note and the keys' root notes marked, so a bass that's too much on one note shows.
The view keeps its level range steady as the music moves: it widens at once when the curves would leave it, and narrows, smoothly, only when there's plenty of room. Point at the curves to see the frequency and note there, and how far the mix sits from the Target at that point.
Under the curves, the low end's figures: the loudest Sub and Bass notes ("Sub A1 55.0 Hz"), Low mono (how alike Left and Right are below 120 Hz, from +1, mono, down; under +0.8 it's marked, as a wide low end loses punch and can cancel on mono systems), and the crest of the Sub and Bass (peak over average, in dB: how punchy they are) against the Target's.
Average sets how far back the mix's curve reaches: 3 s, 10 s (the default), 30 s or Whole (everything since Reset average). Freeze keeps the curve as it is now as a ghost, to compare before and after a change. Add files… ▸ A bounce of your mix, to compare… compares a bounce of your mix instead of the live Source; Stop comparing goes back.
Listening A/B
When the song you compare with came from a file, A and B appear on the Meter: A is your mix, B plays the song, turned up or down to your mix's loudness so the louder one doesn't sound better just for being louder. The song keeps running while you hear A, so switching back picks up where it is; it loops at its end. While B plays, the mix's average pauses.
A Spectrum can show B too: with a song loaded for A/B, Show B in the Spectrum's menu draws B's spectrum as a grey layer, gain-matched to your mix, while you hear either. Compare the two traces as you switch.
Under the curves, the song's waveform shows where B is. Drag across it to choose the part B plays, say the drop, and it loops just that part; click to play from a point to the end, double-click for the whole song again.
While B plays you hear the song alone:
- On Send Plugins, the Das-Meter Send the Meter listens to goes quiet (it fades out and back in).
- On System Capture, everything else on the computer goes quiet, your DAW too; only Das-Meter plays. The Meters still see the mix (on macOS), so switching back is instant. Switch to A and it all plays again, as it does if Das-Meter quits. On macOS this uses the same permission as System Capture; on Windows each other app's sound is muted and unmuted after (an app you'd muted yourself stays muted). On Linux it can't yet, so put a Das-Meter Send on your DAW's master bus, or stop playback, to hear the song alone.
Targets
Make a Target from songs that sound the way you want, your own references. Songs are shown by their file's name (or the name you gave a learned one). The Meter compares with one of them, picked at the top left of the Meter (the song you just added, at first); Average of all compares with all of them together instead.
- Learn a song…, play a song from start to end, give it a name (or leave it as "Song 1"), then Add.
- Add files… ▸ Reference songs for the Target… analyses audio files (WAV, AIFF, FLAC, MP3, Ogg, AAC/M4A, ALAC) in the background, far faster than playing them. You can also drop files or whole folders on the Meter. Files that can't be read are listed with the reason.
By default only each song's loud parts count (its drops and choruses, within 4 LU of its loudest moments); Teach with ▸ Whole song counts all of it. Averaged, the Target's range is how far its songs differ from each other; one song's is ±2.5 dB. Songs lists them, and × removes one.
Each song's key is detected, and its low end is lined up by key before the songs are averaged, so the Target stays note-sharp. When your mix is in another key ("Your mix is in F minor, this Target's songs in A minor"), Shift moves the Target's low end (below 300 Hz) to your key, and it stays there, whatever the key detection says next, until Undo shift. The suggestion only comes once the detection has named the same key for 10 seconds, and then stays. Mix key can also be set by hand instead of detected.
Targets are files in the targets folder (next to curves and themes),
one per Target, holding each song's figures and where its file is (for
A/B), never any audio. An exported Preset takes its Targets along, without
where the files are. Das-Meter ships no Targets: make
your own from music you know.
To show it, right-click a Meter and choose Change Meter ▸ Tonal Balance, or Add Meter ▸ Tonal Balance.
Small sizes
When a Meter gets small, it shows less (fewer labels and readings) rather than letting them overlap.