Tonal Balance and A/B
The Tonal Balance Meter tells you whether your mix's balance, from the sub to the air, sits where the songs you love sit, and A/B lets you hear the difference at the same loudness. This guide goes through it step by step; Meters ▸ Tonal Balance has every setting.
1. Add the Meter
Right-click any Meter and choose Add Meter ▸ Tonal Balance (or Change Meter ▸ Tonal Balance). It listens like every other Meter:
- System Capture: everything your computer plays. Simple, and it's what most Presets use.
- Send Plugins: put a Das-Meter Send on your DAW's master bus and pick it on the Meter. Then only your mix counts, not a notification sound or a video in the browser.
2. Add your reference songs
Pick a few finished songs that sound the way you want your mix to sound, ideally in the same style. Then:
- Right-click the Meter, Add files… ▸ Reference songs for the Target…, and pick the files (WAV, AIFF, FLAC, MP3, Ogg, AAC/M4A, ALAC), or
- drop the files, or a whole folder, on the Meter.
They're analysed in the background, far faster than playing them. Each song appears by its file name. No audio is copied: Das-Meter keeps each song's figures and where its file is.
No files? Learn a song… listens while you play a song from start to end; give it a name (or keep "Song 1") and Add.
3. Pick what to compare with
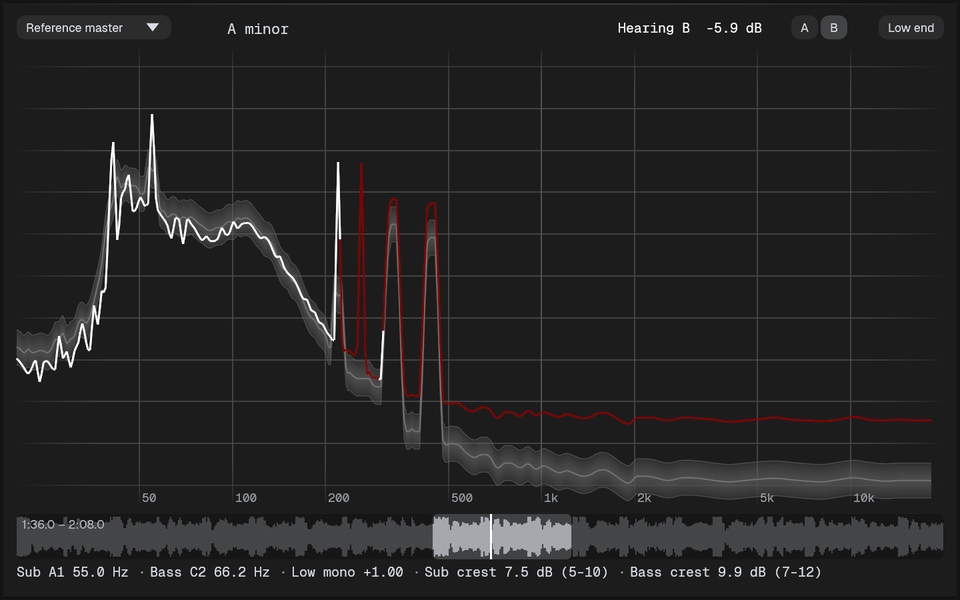
The picker at the top left of the Meter lists your songs. Pick one, or Average of all to compare with all of them together: then the purple range is how far your references differ from each other, a fair "anything in here is fine".
Only each song's loud parts count by default (its drops and choruses), so play the loud part of your mix too when you read the Meter.
4. Read it
Your mix is the line over the purple Target range:
- In the mix colour where it's inside the range: fine.
- Too much (red by default) or too little (blue) where it leaves it, judged over about a third of an octave, as the ear hears balance.
Below the curves: the loudest Sub and Bass notes, Low mono (how mono the low end is; under +0.8 is marked) and the crest of the Sub and Bass (how punchy), each next to the Target's.
Low end zooms into 20–300 Hz with a line on every note: a bass that's too loud on one note shows right away. If your song is in another key than the references, the Meter offers to Shift the Target's low end to your key, so the comparison stays note-sharp.
5. Listen A/B
When the song you compare with came from a file, A and B appear at the top right of the Meter.
- A is your mix.
- B plays the reference song, turned to your mix's loudness (the number next to "Hearing B" says by how much), so the louder one doesn't win just for being louder.
Switch as often as you like: the song keeps running silently on A, so B picks up at once, without a gap. While B plays you hear the song alone:
| Listening to | What goes quiet while B plays |
|---|---|
| Send Plugins | The Das-Meter Send the Meter listens to (it fades out and back in). |
| System Capture on macOS and Windows | Every other app, your DAW too. Only Das-Meter plays. |
| System Capture on Linux | Nothing yet: put a Das-Meter Send on the master bus, or stop playback. |
Everything plays again when you switch back to A, and if Das-Meter quits.
Loop the part you care about
Under the curves is the song's waveform, with a line where B is playing.
- Drag across it to choose a part, say the drop: B loops just that part.
- Click to play from a point to the end.
- Double-click for the whole song again.
See B in the Spectrum too
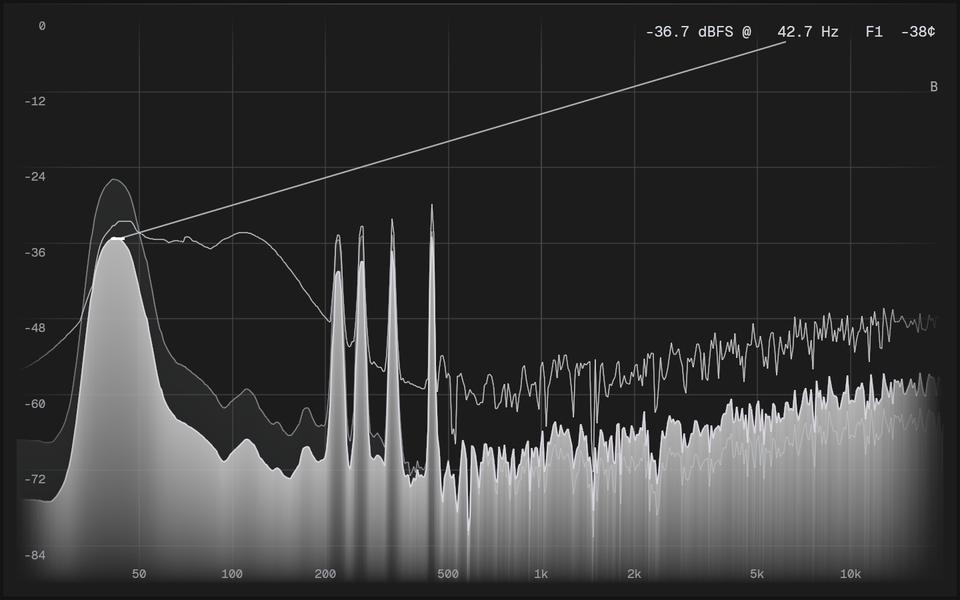
Turn on Show B in a Spectrum's menu: it draws B's spectrum as a grey layer, gain-matched to your mix, under your mix's own trace, while you hear either. Switch and watch where they part.
Tips
- Compare like with like: a drop with a drop, a verse with a verse.
- Trust your ears over the line: the Meter shows where to listen, A/B tells you whether it matters.
- Freeze keeps the curve as a ghost, to see what a change did.
- Add files… ▸ A bounce of your mix, to compare… compares a bounce instead of what's playing now.